
Dry mopping might not be the most exciting chore, but it’s a game-changer for keeping your home clean and dust-free. It’s simple, quick, and super effective if you do it right. Whether you’re dealing with hardwood, tile, or laminate floors, knowing the right tools and techniques can save you a ton of effort and keep your floors looking great. In this guide, we’ll break down everything you need to know about dry mopping so you can master it like a pro.
Key Takeaways
- Dry mopping is perfect for picking up dust and dirt without spreading it around.
- Choose the right mop for your floor type—microfiber mops work well for most surfaces.
- Always sweep or vacuum first to avoid scratching your floors.
- Regularly clean and maintain your mop to keep it effective.
- Create a consistent cleaning schedule to keep your home spotless.
For exceptional service and premium flooring that suits your style and budget, explore our services. Let us transform your space with precision and care.
Why Dry Mopping Is Essential for a Clean Home
Understanding the Benefits of Dry Mopping
Dry mopping is more than just a quick way to tidy up; it’s a key part of maintaining a healthy living space. Unlike wet mopping, which uses water and cleaning solutions, dry mopping picks up dust, dirt, and debris without leaving moisture behind. This makes it especially useful for protecting delicate flooring, like hardwood or laminate, from water damage. Plus, it’s a fantastic way to reduce allergens in your home since it traps particles instead of pushing them around.
How Dry Mopping Differs from Wet Mopping
While wet mopping is great for tackling sticky spills or deep cleaning, dry mopping is all about daily maintenance. Think of it as the first line of defense against dirt. Instead of scrubbing, you’re sweeping with a microfiber or electrostatic mop that grabs onto particles. Wet mopping often follows dry mopping to ensure a thorough clean, but skipping the dry step can lead to muddy streaks and uneven results. The two methods complement each other perfectly. If you’re struggling, take a moment to reposition furniture or use a handheld duster for those stubborn spots. Call us for expert cleaning assistance!
Common Misconceptions About Dry Mopping
- “It’s not as effective as vacuuming.” Actually, dry mopping can reach corners and tight spaces where vacuums struggle. Plus, it’s quieter and doesn’t require electricity.
- “It’s only for hardwood floors.” Not true! Dry mopping works on tile, laminate, vinyl, and even polished concrete.
- “It doesn’t pick up pet hair.” Modern microfiber mops are excellent at grabbing pet hair, dust, and other small particles.
Dry mopping isn’t just about appearances—it’s about creating a cleaner, healthier environment for you and your family. Ever wondered, Is it OK to Wash Laminate Floors with Water? Laminate flooring is popular but sensitive to water. Learn the best cleaning techniques to avoid damage.
Choosing the Right Tools for Dry Mopping
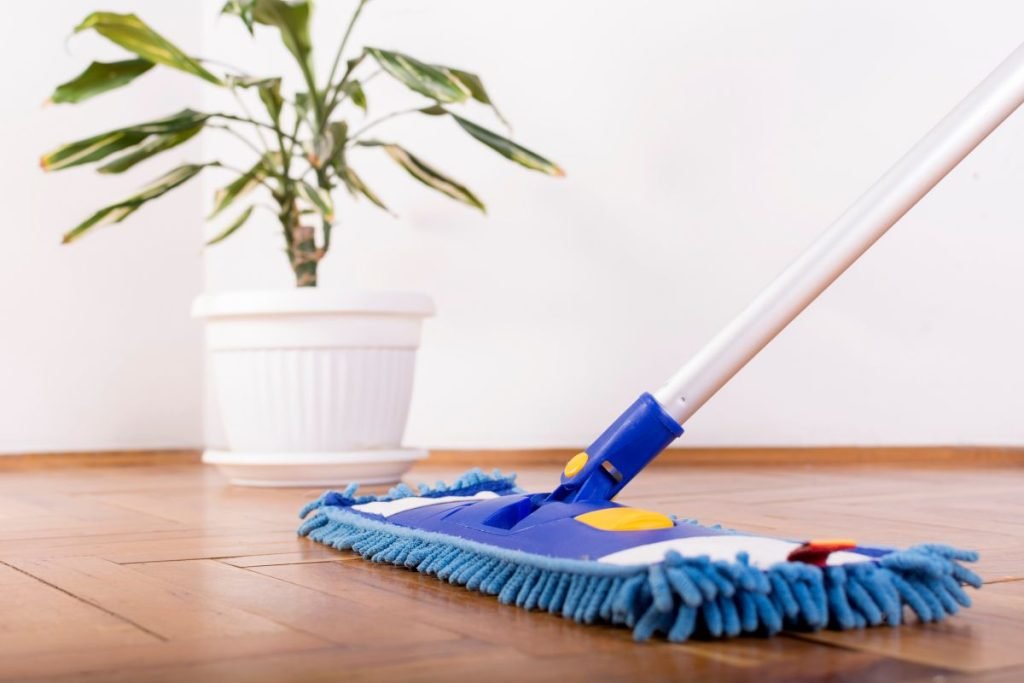
Types of Dry Mops and Their Uses
When it comes to dry mopping, not all mops are created equal. Each type has its strengths, and picking the right one can make your cleaning routine much easier. Here’s a quick breakdown:
- Microfiber Mops: These are great for trapping dust, pet hair, and small debris. They’re lightweight and reusable, making them an eco-friendly choice.
- Static Cloth Mops: Perfect for quick cleanups, these disposable mops work well on smooth surfaces like tile or hardwood.
- Dust Mops with Extendable Handles: Ideal for reaching under furniture or tackling high spaces like ceiling corners.
Looking for a comparison of mops? Check out the best options for different cleaning tasks to find one that suits your needs.
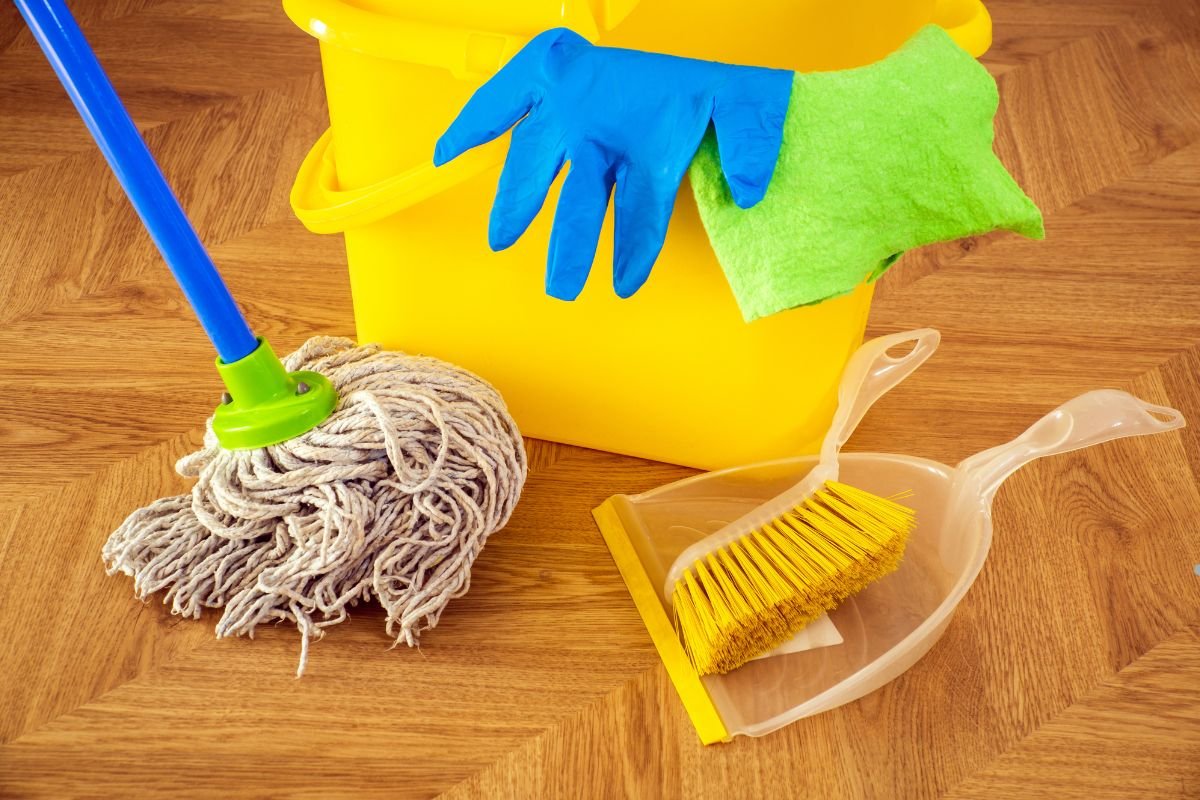
Essential Accessories for Effective Dry Mopping
Having the right accessories can make a world of difference. Here are a few must-haves:
- Replacement Pads: Always keep extra microfiber or static pads on hand to swap out as needed.
- Dustpan and Brush: For gathering larger debris after mopping.
- Mop Storage Rack: Keeps your tools organized and extends their lifespan.
How to Maintain Your Dry Mopping Tools
Taking care of your tools ensures they last longer and work efficiently. Here’s how:
- Clean the Mop Head Regularly: Wash microfiber pads in warm water with mild detergent. Avoid fabric softeners as they can reduce the pad’s effectiveness.
- Inspect for Wear and Tear: Check for fraying or damage to ensure optimal performance.
- Store Properly: Hang your mop in a dry, ventilated area to prevent mold or mildew.
A little maintenance goes a long way. Keeping your tools in top shape means less hassle and better results every time you clean.
Step-by-Step Guide to Mastering Dry Mopping
Preparing Your Floors for Dry Mopping
Before you even grab your dry mop, you’ve got some prep work to do. Skipping this step can make the whole process less effective. Start by clearing any clutter off the floor—shoes, toys, or random items. Next, sweep or vacuum the area to get rid of loose dirt and larger debris. This simple step ensures you’re not just pushing dust around but actually picking it up. If there are sticky spots or spills, tackle those with a damp cloth before you dry mop. For professional cleaning assistance, call us today!
Techniques for Efficient Dry Mopping
Dry mopping isn’t just about dragging a mop across the floor. Use long, smooth strokes and keep the mop head flat against the surface. For best results, work in a systematic pattern—like moving from one side of the room to the other—to ensure you don’t miss a spot. Overlap your strokes slightly to catch every speck of dust. If your mop head starts looking dirty, swap it out or shake it clean outside. A clean mop head is key to getting the job done right.
Tips for Reaching Difficult Areas
Corners, under furniture, and tight spaces can be tricky. Use a mop with a swiveling head or an extendable handle to make this easier. For super-narrow gaps, consider using a microfiber cloth wrapped around a flat object like a ruler. Don’t forget to check behind doors or along baseboards—dust loves to hide there.
Dry mopping may seem simple, but it’s all about the details. Take your time, follow these steps, and you’ll be amazed at how spotless your floors can look.
Dry Mopping Techniques for Different Floor Types
Best Practices for Hardwood Floors
Hardwood floors are beautiful but can be easily scratched or damaged if not cleaned properly. Always use a microfiber mop for dry mopping, as it gently picks up dust without causing scratches. Avoid dragging heavy furniture across the floor and use furniture pads to prevent scuffs. For deeper cleaning, follow up with a lightly damp mop, but ensure it’s only slightly damp to avoid water damage. Refer to the manufacturer’s guidelines for cleaning products to avoid using harsh chemicals.
Dry Mopping Tile and Grout
Tile floors are durable but require specific care to keep them looking their best. Use a dry mop with a soft, non-abrasive head to remove dust and debris. For grout lines, a small brush can help loosen dirt. If stains persist, mix one part hydrogen peroxide with two parts baking soda to create a cleaning paste. Apply it to the grout, scrub gently, and then wipe away the residue with a damp mop. Remember, natural stone tiles need a pH-neutral cleaner to prevent damage.
Caring for Laminate and Vinyl Floors
Laminate and vinyl floors are resilient but can lose their shine if not maintained properly. Dry mopping is a great way to keep them clean daily. Use a microfiber mop to avoid scratches and remove dust effectively. For occasional deeper cleaning, use a damp mop with a cleaner specifically designed for laminate or vinyl. Avoid excessive water, as it can seep into the seams and cause warping or bubbling. Never use abrasive cleaners or steam mops on these surfaces, as they can damage the protective layer.
Common Mistakes to Avoid When Dry Mopping
Using the Wrong Mop for the Job
Not all dry mops are created equal, and using the wrong one can make cleaning harder than it needs to be. For instance, a flat microfiber mop works wonders on smooth surfaces, while a dust mop with a larger head is better for covering big areas. Choosing the right tool for your floor type is key to getting the job done efficiently. Don’t forget to check the material of your mop head—some are better suited for hardwood, while others work best on tile or laminate.
Skipping Pre-Cleaning Steps
One of the biggest mistakes people make is skipping the prep work. If you don’t sweep or vacuum beforehand, you’re basically just pushing dirt around. This can lead to scratches, especially on delicate surfaces like hardwood or laminate. Always take a few minutes to remove loose debris before you start dry mopping. It’s an extra step, but it makes a huge difference in the final result.
Overlooking Regular Maintenance
Dry mops need love too! If you’re not cleaning or replacing your mop head regularly, you’re not really cleaning your floors—you’re just redistributing dust and grime. Wash reusable mop heads after every use and replace disposable ones as needed. A dirty mop head can even leave streaks or residue behind, which defeats the purpose of mopping in the first place.
Regular maintenance of your mopping tools not only extends their lifespan but also ensures your floors stay as clean as possible.
By avoiding these common pitfalls, you’ll make dry mopping faster, easier, and way more effective. Remember, the right prep and tools can save you a lot of hassle down the road.
Maximizing the Benefits of Dry Mopping
Combining Dry Mopping with Other Cleaning Methods
Dry mopping is excellent for grabbing dust and dirt, but pairing it with other cleaning methods can take your routine to the next level. Start by vacuuming or sweeping to pick up larger debris. Then, dry mop to catch the fine particles left behind. For heavily trafficked areas, follow up with a damp mop or spot cleaning to remove any sticky residue. This layered approach ensures your floors stay spotless longer.
How Often Should You Dry Mop?
The frequency of dry mopping depends on your household’s activity level. For homes with pets or kids, dry mopping every day or every other day can keep allergens and dirt in check. If your home is quieter, once or twice a week might be enough. Consistency is key—regular dry mopping prevents dust buildup, making deeper cleaning sessions less frequent and less time-consuming.
Creating a Cleaning Schedule for Your Home
A cleaning schedule helps you stay organized and ensures no area is overlooked. Here’s a simple weekly plan:
| Day | Task |
| Monday | Dry mop living areas |
| Wednesday | Dry mop bedrooms |
| Friday | Dry mop kitchen and hallways |
| Weekend | Spot clean and damp mop if needed |
Breaking tasks into smaller, manageable chunks makes it easier to stick to your routine without feeling overwhelmed.
For laminate floors, remember to dry them promptly after mopping to avoid moisture damage. Using a separate dry mop for this purpose can help maintain their appearance and longevity. Learn more about maintaining laminate floors.
Dry mopping might seem like a small task, but it can make a big difference in keeping your home clean and comfortable. With the right tools and a little know-how, you can tackle dust and dirt without breaking a sweat. Remember to choose the right mop for your floors, work in sections, and keep your mop clean as you go. It’s all about building good habits—like regular sweeping and spot cleaning—to keep your floors looking their best. So grab your mop, put on some music, and make it part of your routine. A clean floor doesn’t just look good; it feels good too. Happy mopping!
Frequently Asked Questions
What is dry mopping, and why is it important?
Dry mopping is a cleaning method that uses a dry mop to pick up dust, dirt, and debris from your floors. It’s important because it helps keep your home clean and reduces allergens without the use of water or chemicals.
Can I use a dry mop on all types of floors?
Yes, dry mops are safe for most floor types, including hardwood, tile, laminate, and vinyl. However, make sure to choose a mop with a soft microfiber head to avoid scratching delicate surfaces.
How often should I dry mop my floors?
It depends on your household. For high-traffic areas, dry mopping daily or every other day is ideal. For less-used spaces, once or twice a week should suffice.
What’s the difference between a dry mop and a wet mop?
A dry mop is used without water or cleaning solutions to remove dust and debris, while a wet mop uses water or cleaning products to clean sticky messes and stains. Both serve different purposes in maintaining clean floors.
How do I maintain my dry mop for long-term use?
To keep your dry mop in good condition, clean the mop head after each use. Most microfiber mop heads can be machine-washed. Avoid using fabric softeners, as they can reduce the mop’s effectiveness.
Can dry mopping replace vacuuming or sweeping?
Dry mopping can often replace sweeping for hard floors, as it effectively picks up dust and debris. However, for carpets or heavy dirt, vacuuming is still necessary. If you have any questions or need further tips, feel free to contact us. We’re happy to help!
